May 14, 2010

Postcard from Debbi

"Listen to your life.  See it for the fathomless mystery it is.  Touch, taste, smell your way to the holy and hidden heart of it beacause in the last analysis, all moments are key moments and life itself is grace."

~ Buechner

Postcard from Kelli

"A girl should be two things: classy and fabulous."

~ Coco Chanel

Postcard from Helen

This has nothing to do with the garden, but I'm going to display the "postcard art" from Debbi's fun Mail Art Postcard Club!

So the concept is that you make a 4" x 6" postcard and "art it up" any way you want to, and then put a quote on the back and mail one to each of the twelve people in the group.  Ooh, aah, behold...

And yes, I will post mine too when I get them completed.  (I know, I know...  I'm working on them!!)

"This cap has been created & donated to the Make-A-Difference Group at The Lorenzo First United Methodist Church. Then on to The Joe Arrington Cancer Center in your name. May God Bless"

Postcard art for the greater good - Awesome!!

May 8, 2010

Jalapeno Hard Candy

So, I ended up doing something completely random and unplanned today.  I made jalapeno hard candy - and it actually turned out great unlike some random and unplanned things I wind up doing.

Jalapeno hard candies

I'd read some things online recently about candied chilis which I want to try, and that lead me to wonder what else I could do with chilis that was "outside of the box."  Speaking of things that are "outside of the box," I remember seeing tequila lollipops years ago, complete with worms in the middle.  I didn't eat one.

Anyhow, I thought that if one could candy chilis surely you could make chili candies.  I've always wanted to try my hand at making hard candy, and everytime I think about it, I remember those tequila lollipops...

I found lots of information available online about how to make hard candy, and there were recipes for jalapeno candies.  And as with most stuff online, the more I looked, the more complicated the instructions become.  So here's what seemed to be the most important:  use a 50/50 sugar and corn syrup blend and use a candy thermometer to make sure you get the temperature right.

Using a candy thermometer to reach the hard-crack stage at 300 degrees.

(If you're new to this like me, the temperature to which you heat a sugar syrup will determine what it "does" after it cools, i.e. stays soft, gets chewy, turns hard, gets so sticky it rips your teeth out...  Here is a great link on the different temperatures and stages from The Science of Cooking website by Exploratorium.  Isn't that a great name??)

So here's what I ended up doing.  I used 100 grams of light Karo syrup that I've had for a hundred years, 100 grams of sugar, and 70 grams of water.  This was enough to yield about one cup of finished candy.

First the sugar disolves, then it boils, then it bubbles and gets thick, and then it starts to stick to everything and gets really thick.  I don't know how long it took to heat up to the hard crack stage (300 degrees).  I checked the start time, but when things got rolling I got excited and forgot to check the time.  I'd estimate it took twenty or thirty minutes over medium heat.

I have some jalapeno powder that I made a couple of years ago by dehydrating and then pulverizing the jalapenos from my garden.  Peppers processed in this manner seem to last forever, but beware because they get very, very hot, and a little goes a long way.  I sifted my jalaepno powder to isolate the finest particles and used that to flavor my candy.  I added the jalapeno powder early in the cooking process just after the sugar had disolved.  I didn't measure how much I used, but it was just a little.

Powdered jalapenos

When the sugar solution reached 300 degrees, I poured it into an oiled glass 8x8 dish.  It cools quickly, so after just a few seconds, I transfered it to an oiled cutting board, used a dinner knife to divide it into two pieces and then began rolling and pulling them into two long pieces.  The candy is HOT, so you can't handle it for long, but the shape doesn't have to be perfect, just appropriate for cutting into smaller pieces.  I then used a large chopping knife to cut each candy "log" into smaller bite-sized pieces.  You really only have maybe 60 to 90 seconds from pouring the syrup out of the pan to having it shaped and cut before it cools.

I lucked out and seemed to get the right amount of jalapenos into the candy to make it hot and sweet but not painful.  Here's another tip:  when you're boiling the syrup, use a spoon to drop a small amount into cool water so that it hardens and you can test your flavoring to see if it's "right."

As an aside, I'm in the process of candying some oranges right now, and when I'm done with those, I think I'll use the orange flavored syrup to make some orange candy next - I can't wait!!

Two batches of the above recipe made around two cups of finished candy.

"Hey kid! Do you like clowns??"

Okay, this is totally cracking me up right now!

Last weekend when I visited my nephew, Libby made brownies, and Worth helped by licking the spoon.  Check out that brownie batter smile!!

Yikes!!

May 7, 2010

'Gold Flame' Honeysuckle

My 'Gold Flame' honeysuckle is in full bloom right now, and it is georgeous!!

Honeysuckle is a super, easy-to-grow ornamental vine for our area.  The 'Gold Flame' variety has salmon pink blooms with a yellow throat.  Also available in the garden centers right now is the 'Coral' variety which has bright orange blooms (I always thought the names on these two were the opposite of what they should be!) and 'Halls' honeysuckle which has fragrant white and yellow blooms.  'Halls' honeysuckle is probably the one you remember "tasting" when you were a kid!


Close-up of a 'Gold Flame' honeysuckle bloom.

All of the honeysuckle varieties can be grown as a ground cover or on a trellis or topiary.  It will twine up just about anything, but it won't stick to your fence or wall.  Once estabilished, honeysuckle doesn't need much water, but it does require vigilant pruning as it can rapidlly overtake an area of your landscape. For that reason, I prefer to grow mine on a free-standing iron topiary my mom gave me for my birthday a few years ago.


Topiared honeysuckle covered with blooms.

Honeysuckle prefers full sun but is tolerant of some shade.  It blooms most heavily in early spring and will continue to bloom sporadically through the summer.

A word of warning:  I did manage to kill some of mine several years ago by overwatering it.  My nursery customers at the time were amazed by this because killing honeysuckle is hard to do!  If overwatered, it can develop powdery mildew (it looks like white baby powder on the leaves), and if you still keep watering it (which I did!), it will die.  Other than that, you'll have an easy time with it and enjoy the blooms (and fragrance of the 'Halls') for most of the growing season.

May 6, 2010

Ornamental Grasses: 'Cabaret' Miscanthus

Ornamental grasses do great in our area.  They are easy to grow, don't require a lot of care, and they capitalize on our frequently windy conditions by adding movement and texture to the landscape.

Some of the most popular ornamental grasses for our area Miscanthus and Pennisetum (fountain grass).  The biggest difference that you'll notice is that the Miscanthus varieties have a fan- or tassel-shaped bloom while the Pennisetum varieties have more of a plume-type bloom more similar in appearance to cattails.


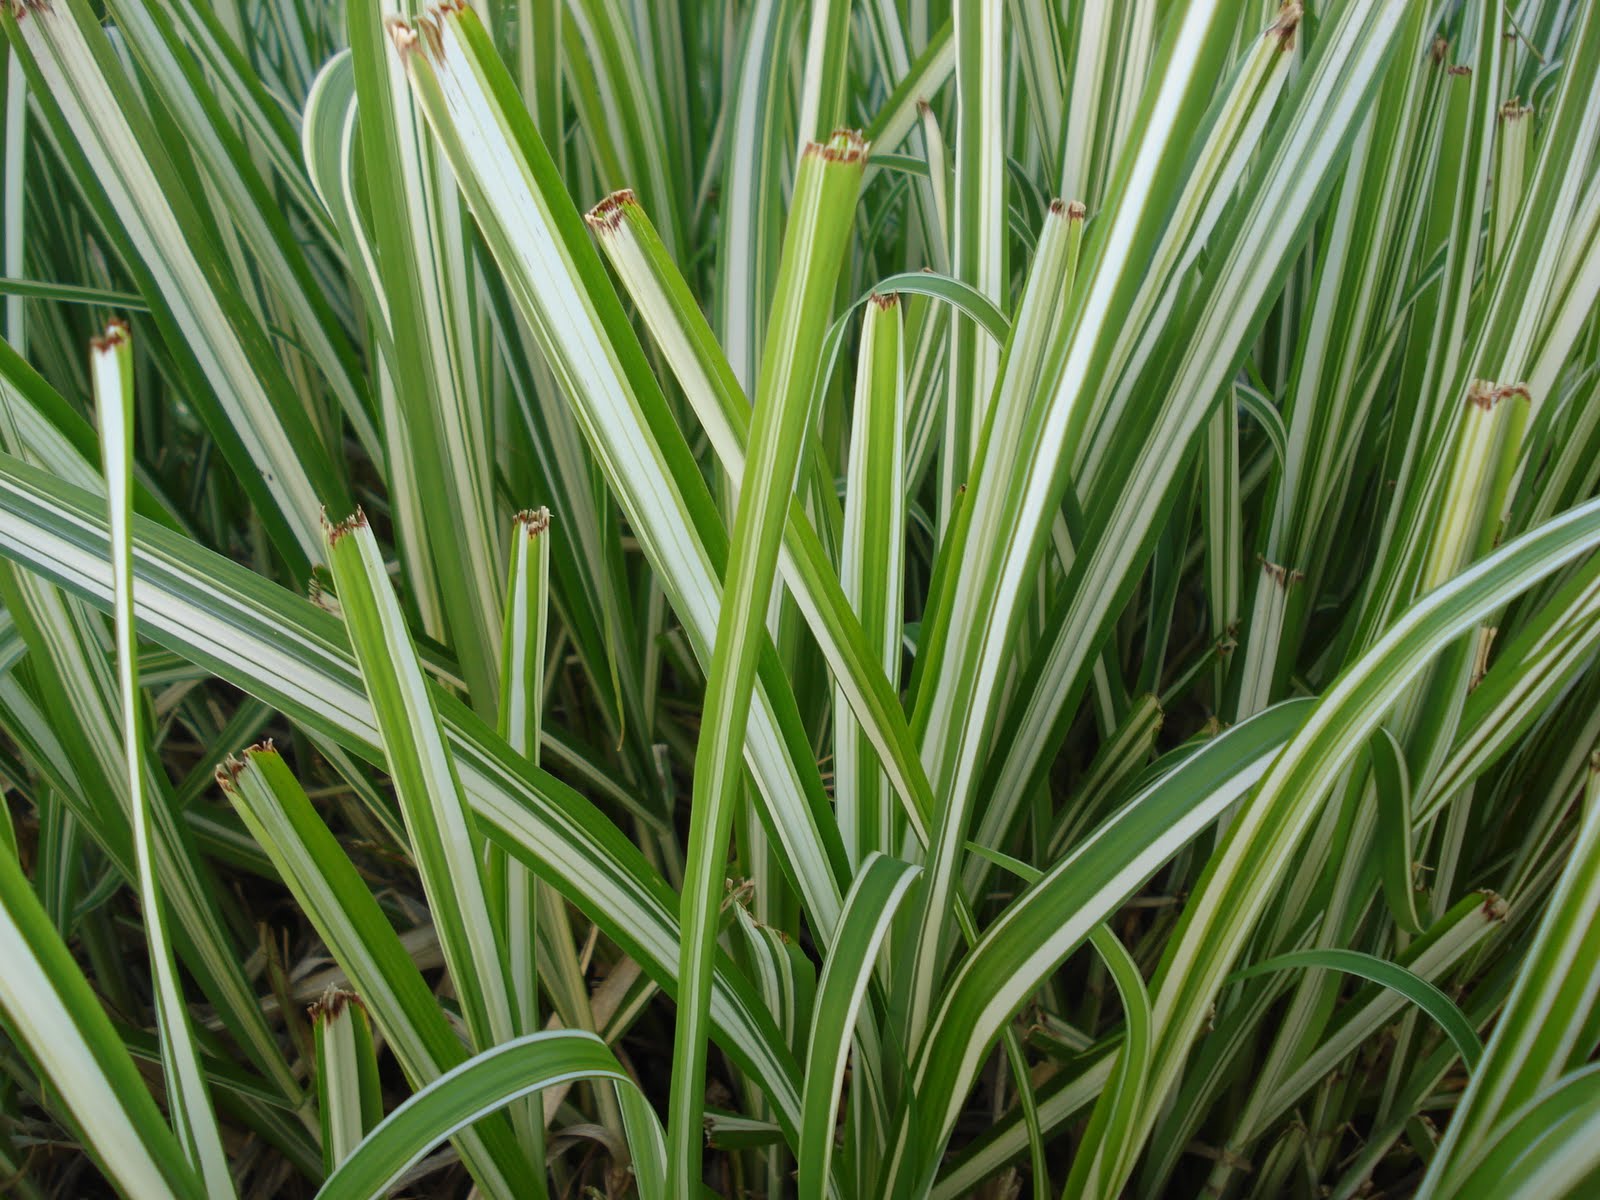
'Cabaret' Miscanthus is one of my absolute favorites! You can see how it's striped foliage stands in contrast to the darker foliage of the rosemary and crape myrtle in the background. It's perfect for brightening up a shady corner of your yard!


Here's a close-up where you can still see the results of a late shearing that damaged the tips of the new growth.  'Cabaret' Miscanthus has wide leaves with strong vertical creamy white stripes.


My grasses are just starting to flush out after a fairly late shearing. You can still see some of last year's "leftovers" around the base. 

Most Miscanthus and Pennisetum varieties will grow to around four or five feet tall, bloom in the late summer, and are available in variegated (stiped) and solid green varieties.

All of the varieties that I know of are hardy in our area with the exception of Purple Fountain Grass (Pennisetum purpurea) which is used here as an annual. I guess that's the price you pay for such striking burgundy foliage!

April 7, 2010

Herbs: Oregano, Thyme, & Lavender


My herbs are really flushing out for spring.  Above is oregano which was really puny just a few weeks ago .  (That's phlox in the background with the little pink flowers.)

Another shot of oregano.

Thyme in the foreground, lavender in the upper left, and phlox in the back (bright green).

April 4, 2010

French Toast with Whipped Cottage Cheese, Walnuts, & Thyme


I had French Toast for brunch (made with fresh thyme from the garden) on Saturday.

This is a classic French Toast topped with peachy whipped cottage cheese, toasted walnuts, and fresh thyme - it was wonderful!

I made mine with the Double Fiber Bread by Orowheat (70 cal. and 6 g. fiber / slice) I buy at Walmart.  Whip an egg and a little milk and let the bread soak it up.  Cook over medium heat in a cast iron skillet (no need to use oil) while toasting chopped walnuts in a separate pan (I used my grandmother's 6" cast iron pan).

In a food processor, I whipped some non-fat cottage cheese with homemade peach jam made by my sister-in-law's dad Bill until it was smooth and creamy.

When the bread has cooked on both sides, move to a plate, drizzle with the whipped cottage cheese, sprinkle with fresh thyme, and top with the toasted walnuts.  Then snap a picture for your blog.

(Whipped cottage cheese with herbs and cracked pepper makes a great spread for bagels, breads, and crackers - especially when topped lightly with olive oil.  When sweeted with fruit or syrup, it's wonderful with sweeter dishes or even by itself as sort of a mousse-like dessert.  It's very simple to make.  Simply whip the cottage cheese in a food processor or blender with any ingredients you desire until smooth.)

The addition of fresh thyme to this dish was inspired by The Flavor Bible by Karen Page and Andrew Dornenburg.  It's really a neat book you should check out if you enjoy creative cooking and experimenting with new flavor combinations.


The Flavor Bible contains lists of flavor affinities recommended by the world's top chefs.

April 3, 2010

Elberta Peach Tree Blooms

3/28/2010

These are pictures of my Elberta peach tree.  Peaches only bloom on one-year-old wood, so this is the first time it's flowered (I just planted it last winter). 

According to the Aggie Horticulture website, peaches should be thinned out around four to six weeks after they bloom, so that will be around May 1-15 for me.

The Elberta peach requires around 800 to 850 chilling hours which is considered a high chilling requirement and suitable for our area.  Here is a map showing average chilling hours around Texas.

Here is the bud progression over the last several weeks.

2/27/2010

3/6/2010

3/21/2010

3/25/2010

3/25/2010

3/28/2010

And lastly, here's a picture of Bobette... giving you the cat's eye....